Blog Archives
Harry Potter Party! Library Program
I was a bit skeptical about this as Harry Potter was big in my day, so would it still create excitement now with youth? Apparently so…
 For this event we got sorted into our Houses, created our very own golden Snitch, Transformed into owls, went to Potion’s class, made a witchy treat, and had couple of props for photo ops. And we all had a blast. And most surprising to me was that the boys outnumbered the girls…which NEVER happens!
For the sorting I found a great printout for (what I considered badges) at My Cotton Creations and after cutting them out just stuck them in a witch’s hat and had the kids pull out their House for the night. They were excited they got to wear the badges and it made everyone feel involved because EVERYONE wanted to know who was in their House.
After we were sorted and settled we began our Snitch making (See example in above picture). For this project all that was needed were:
- Small Styrofoam Balls
- Gold Glitter
- Gold Glitter Glue
- Long White Feathers
- Mod Podge
- Paint Brushes
(Covering all tables to be used for the event with old newspaper is major clean-up time-saver too! And if you can get some volunteers to do it…Even better)
So first we poked holes in two opposite ends of our Styrofoam balls where our feathers would eventually go and then coated the whole thing in some Mod Podge. Then things got a little (well more than a little..) messy and we covered our Snitches in gold glitter. After that we put a squirt of gold glitter glue in our previously made holes, and stuck in our feathers. And there you have it…magnificent Snitches!
We left our Snitches to dry for a bit and moved on to Transformation class! For our transformations into owls we decorated some eye masks. For this project the following materials are what I used, however, the possibilities are endless:
- A few packages of Eye Masks (they are 5 for a $1 at the Dollar Store)
- Colorful Feathers (again tons of options at the Dollar Store)
- Sequins
- Puff Balls
- Glue/Glue Dots
This one’s pretty self explanatory…just let the kid’s creativity go crazy and they will come up with a great “owl” mask.
After our Transformation we headed over to Potions. The following items are needed for this interactive experiment (Also, it’s nontoxic if anyone happens to get the urge to try the potions…which WILL happen):
- Tonic Water
- Different Colors/Flavors of Kool-Aid
- Sugar
- Lots of Clear Plastic Cups
- Spoons
- Solid Colored Plastic Cups
For this project, myself and a volunteer had prepared our magical potions beforehand. All the “magical potion” requires is mixing a bit of the Kool Aid flavoring in with enough sugar so that the color of the Kool Aid can’t be seen in the solid colored plastic cups. (It will take quite a lot of sugar in comparison to the Kool Aid.) Then we also filled up our clear plastic cups with the bubbly tonic water.
When the “students” arrived all they saw were cups that were apparently all white powder and then clear bubbly cups. They each took a cup of magic potion and a cup of bubbly water and then spooned in a bit of their potion. I didn’t know if this would go over because it was so simple, but they all seemed to enjoy it…a lot. Then they all began exchanging potions to see what would happen and of course they ended up turning different colors which was pretty cool too and not something I would have thought of. Of course everyone started to sneak in quick tastes of their potions so luckily nothing bad was in it.
 After everyone was done with mixing their potions (and washing their hands) we moved on to creating our own snacks. Witch hats made out of Fudge Stripe cookies. I found this idea on Go Grow Go! They were simple for the kiddos to make and were verrry tasty!
- Fudge Stripe Cookies
- Orange Frosting
- Hershey Kisses
So each kid got a napkin with a cookie on it and a Kiss to unwrap, while an adult went around with the frosting. The frosting just got squirted on top of the bottom of the cookie and then the Kiss gets planted on top. Then they were ready to be eaten!
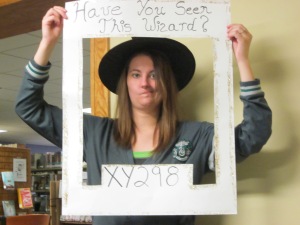
There were also a couple of photo props like the one below which I just handmade myself. The kids had fun taking pictures of themselves with their phones and I had some fun some with it too!